Dell Precision 7750 Memory Upgrade
| Author: | Rob Pulsipher |
|---|---|
| Date: | February 2021 |
Summary
A tutorial focused on upgrading the primary memory of a Dell Precision 7750. Covers a few hints and pitfalls that I encountered. Upgrading the primary memory requires removing the keyboard in order to access all of the memory slots. It is not intuitively obvious how to accomplish this task without breaking something. This article focuses on several pitfalls you may encounter.
Instructions
Remove the Back Panel
There are eight (8) screws holding on the back panel. There are also clips that secure it around the edge. It is easiest to wedge a plastic pry tool under the gap where the PIV reader is located, and work around from there.
Remove the Battery
There are three (3) screws holding the battery. Disconnect the wire by using the pull.
Disconnect the Keyboard Ribbon Cables
The keyboard has two ribbon cables that connect underneath the battery compartment, as shown. Note: The other near-by ribbon cables do not attach to the keyboard. Also note, the previous model had more ribbon cables attaching to the keyboard.
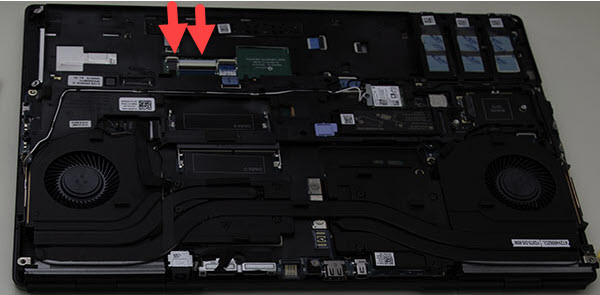
Each connector has a tab that flips up from the ribbon side. Notice that there are two hooks on the edges of the ribbon cable that hold it in place. The end of the ribbon also fits into a space in the connector. It is necessary to simultaneously pull the ribbon up, over the hooks, and out of the space.
Each cable has a plastic pull tab that facilitates it's removal.. Use this to gently pull the cable out.
Remove the Keyboard Lattice
The lattice is held in place with clips. There are two dimples on the top edge of the lattice that indicate where to start. Starting at the dimples, use a pry tool to gently remove the lattice. There are several clips around the edge, and several in the middle. Be gentle.
Loosen (But Don't Remove) the Keyboard
The keyboard is held in place with six (6) screws and several clips. The clips are mostly on the sides of the keyboard. Remove the screws and loosen the clips, again being very gentle. Don't remove the keyboard yet. It is necessary to carefully guide the ribbon cables through from the back when removing the keyboard.
Removing Keyboard
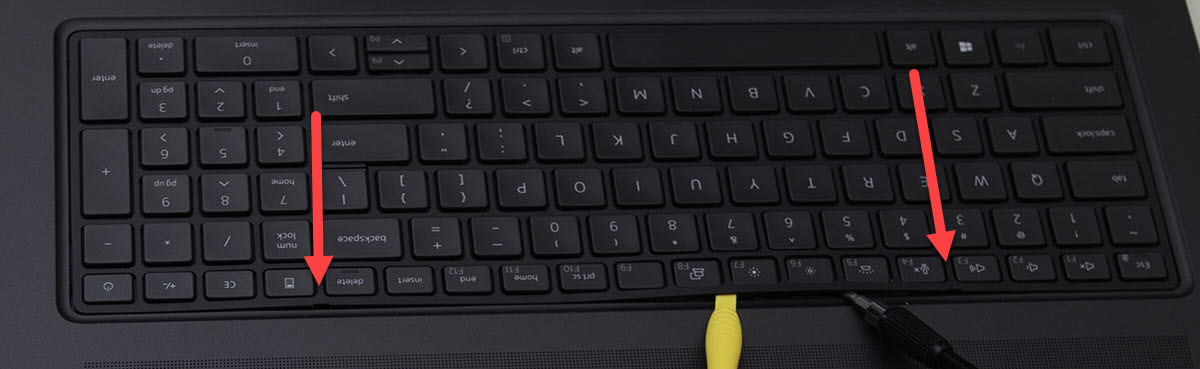
Hold the keyboard, and carefully feed the ribbon cables through from the back, while holding the keyboard from the front.
Important: There is a thin plastic part mounted to the inside of the gap where the ribbon cables are fed through. The pull tabs on the ribbon cable have a tendency to catch on this thin plastic part and get wedged there.
Remove Panel Covering the RAM
Unscrew the single screw. Slide the panel to unhook it, and lift out.
Replace RAM
The RAM is removed by pushing out on the two metal clips. This doesn't require much force; the RAM should pop up easily.
Insert the new RAM. Align the notch, and slide in from a slight upward angle, until the side notches are aligned, and then gently push down on the corners until it latches on both sides.
Replace the cover over the ram.
Reinstall the Keyboard
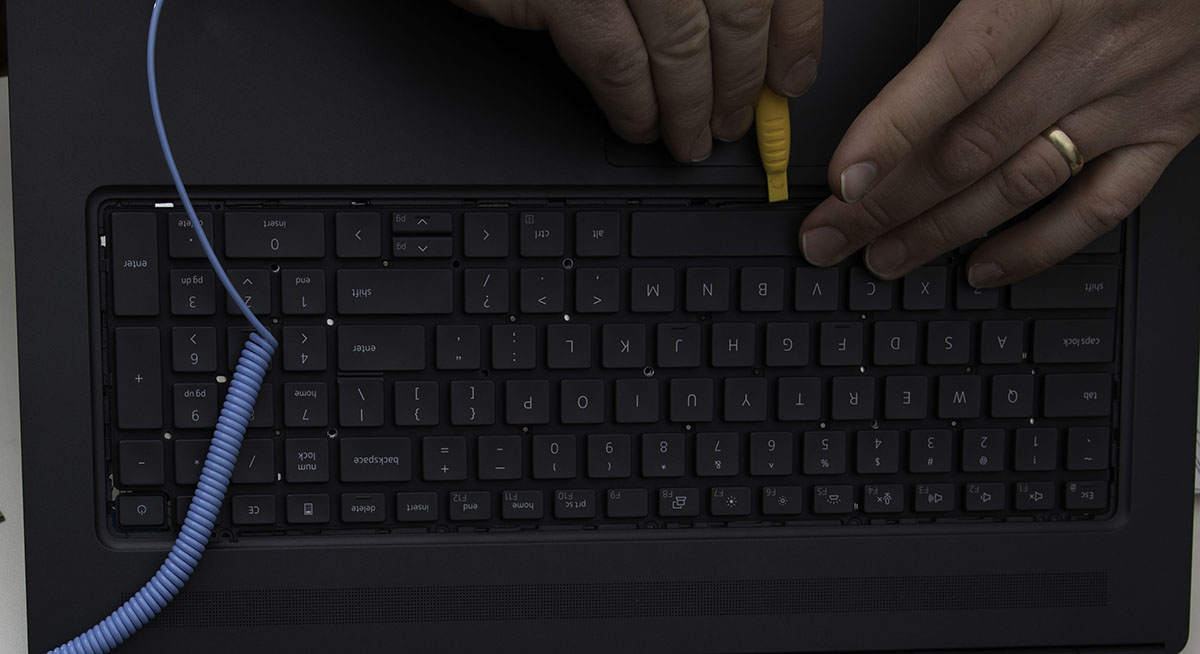
The ribbon cables are the hard part here as well. They catch on that plastic part when reinstalling them as well. Carefully guide the ribbon cables through most of the way. Next, tilt the keyboard up slightly from the bottom, in order to slide in the top catches. Then, use a plastic pry tool to push the last of the ribbon cable through so the keyboard will sit properly. (see below)
Press keyboard to reattach side clips. Then screw it down.
The lattice reattaches with clips. Press down gently all-over to reattach.
Finally, reattach the ribbon cables. The pull tab can be used to get the proper angle, so that the end of the ribbon slides down and into the connector, over the side hooks. Once the cable is over the side hooks, gently close the connector.
Install More RAM and NVMe
If you made it this far, the hard part is over.
Reinstall the battery
One trick here: There are some little hooks along the bottom of the battery. You need to tilt the top of the battery up and make sure all of the hooks go under the plastic. If you miss this, the back of the case will not hook on correctly. (I had to take the case off a second time to fix it.)
